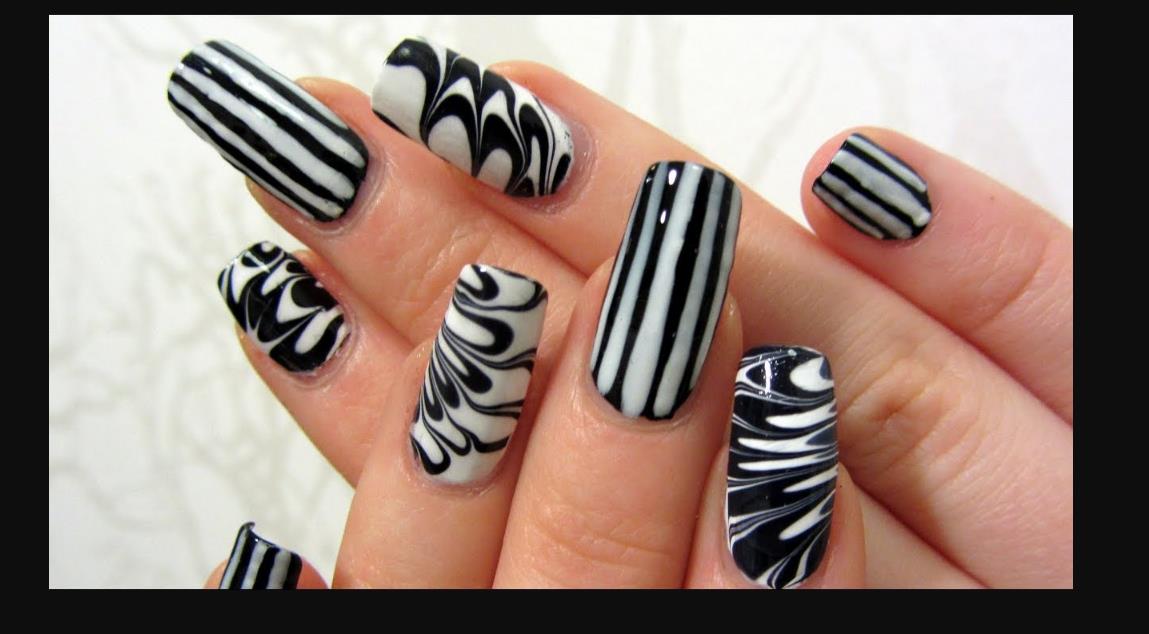
Black and white nails are a timeless nail art trend featuring manicures designed with only two classic shades—black and white. This color combination creates bold, high-contrast designs that stand out on any nail shape or length. Whether it’s minimalist stripes or complex patterns, the elegance and versatility of black and white nails make them a favorite for all seasons and occasions.
Sleek, edgy, and effortlessly chic—black and white nails are more than just a beauty trend; they’re a fashion statement. From glossy finishes to matte swirls, these designs give off serious runway energy without trying too hard. With endless creative options like cow prints, florals, geometrics, and celestial themes, there’s something in this style to match every mood and aesthetic.
What makes black and white nails so special is how they blend simplicity with drama. These nails are perfect for anyone who wants a clean yet bold look, whether for everyday wear or special events.
Why Black and White Nails Never Go Out of Style
Black and white nails have maintained their coveted status in nail fashion since the 1920s Art Deco era. Unlike fleeting color trends, this classic combination offers unparalleled versatility. According to a 2024 nail trend survey by Nailpro, 78% of nail artists reported increased requests for monochrome nails, particularly among fashion-forward clients.
Benefits of choosing black and white nail designs:
- Perfect match for any wardrobe color
- Suitable for all seasons and occasions
- Creates visual impact without overwhelming
- Offers professional polish for workplace settings
- Provides endless design combinations
Chrome Chameleon Nails
It creates a mirror-like finish that shifts between metallic tones while maintaining the classic black and white palette. This futuristic technique requires specific products and application methods.
Essential products for chrome application:
- Black gel polish base
- No-wipe top coat
- Chrome powder in silver or pearl
- Silicone applicator tool
- UV/LED lamp
For best results, apply chrome powder while the no-wipe top coat remains slightly tacky. Use gentle circular motions to buff the powder until achieving full coverage. The final effect creates depth and dimension impossible with regular polish.
Pro tip: Combine matte black base with chrome white accents for a sophisticated contrast that catches light beautifully.
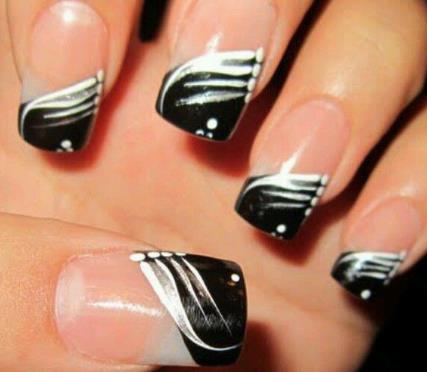
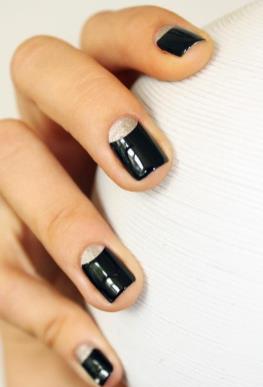
Abstract Reverse French Tips
Reverse French manicure flips the traditional design by emphasizing the cuticle area instead of nail tips. This modern take allows for creative freedom in shape and placement.
Popular abstract variations include:
- Diagonal swoops
- Irregular scalloped edges
- Asymmetrical curves
- Double-lined designs
Tools needed:
- Precision brush (size 000)
- Striping tape for clean lines
- White gel polish
- Black or clear base coat
Start with black polish as your base, then create white crescents at the cuticle. Experiment with line thickness from 0.5mm to 3mm for different effects.
Dynamic Swirl Art
Swirling patterns transform black and white nails into miniature abstract paintings. Three primary techniques deliver different styles:
- Water marble: Drop polish into room-temperature water, create patterns with a toothpick, then dip nails
- Gel mixing: Apply both colors while wet, blend with thin brush
- Brush strokes: Layer alternating colors in sweeping motions
Common mistakes to avoid:
- Using old, thickened polish
- Moving too slowly when swirling
- Applying excessive layers
Styling tip: Match swirl patterns to your outfit’s movement – horizontal swirls complement flowing dresses, while vertical patterns suit structured blazers.
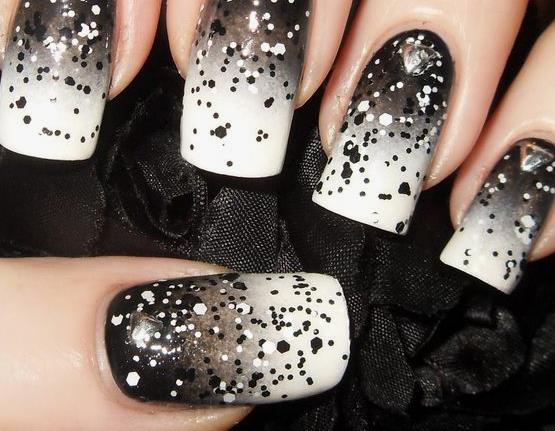
Strategic Glitter Accents
Glitter accent nails add sparkle without overwhelming the classic monochrome palette. Position glitter strategically for maximum impact:
Best placements:
- Ring finger only
- Tips only
- Gradient from cuticle
- Negative space outlines
Choose between micro glitter for subtle shimmer or chunky glitter for bold statements. Apply clear top coat twice to prevent glitter from catching on fabric.
Contemporary Marble Veining

Marble nails mimic natural stone patterns using black veins on white base. The blooming gel technique creates realistic effects:
- Apply white base coat, cure
- Paint thin black lines with gel polish
- Drop blooming gel alongside lines
- Watch veins naturally spread
- Cure immediately when pattern looks right
Alternative method: Use regular polish with plastic wrap for texture, though gel delivers more controlled results.
Minimalist Heart Motifs
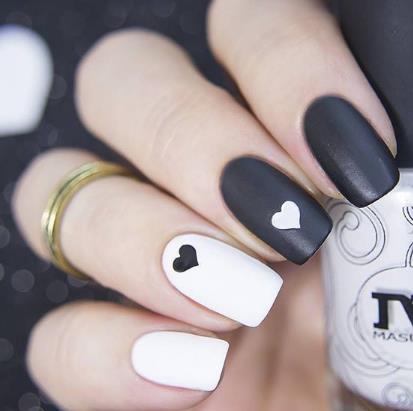
Heart accents add romance to monochrome designs without appearing juvenile. Negative space hearts create sophisticated looks suitable for any age.
Tools for tiny hearts:
- Dotting tool (0.5mm tip)
- Heart-shaped stencils
- Silicone stamper
- Fine detail brush
Position hearts strategically: single heart on accent nail, trail of micro hearts, or negative space border design.
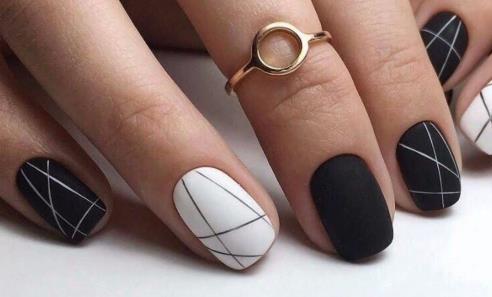
Architectural Line Work
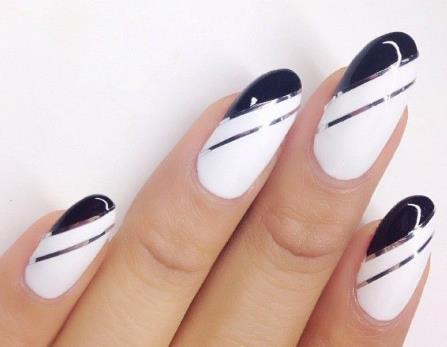
Precise lines transform black and white nails into miniature architectural studies. Freehand technique requires steady hands, while tape guarantees crisp edges.
Line thickness guide:
| Technique | Thickness | Best For |
|---|---|---|
| Striping brush | 0.3-1mm | Delicate designs |
| Tape method | 1-3mm | Bold statements |
| Dotting tool | 0.5-2mm | Accent details |
Create movement by varying line direction: diagonal for energy, curves for softness, parallel for structure.
Modern Leopard Print Evolution
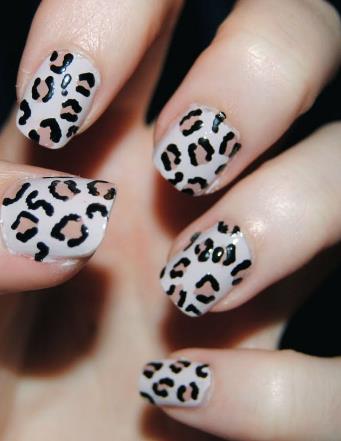
Leopard print receives contemporary updates through geometric interpretation and scale variation. Beyond traditional spots, explore:
- Hexagonal leopard patterns
- Macro and micro print mixing
- Negative space leopard
- Metallic outline spots
Styling hack: Match leopard print density to occasion – sparse spots for office, dense patterns for nightlife.
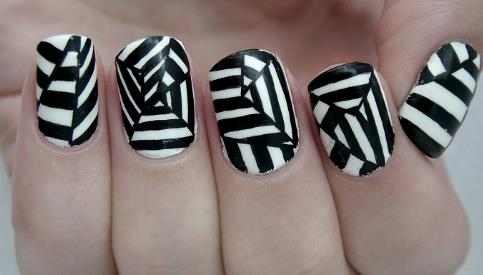
Zebra Stripe Variations
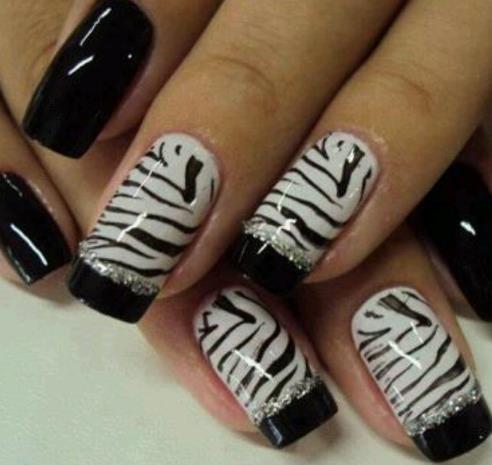
These tips move beyond horizontal stripes into artistic territory:
- Vertical stripes for elongating effect
- Diagonal patterns for dynamic energy
- Gradient stripes fading from black to gray
- Mixed-width stripes for depth
Use striping tape for beginners, graduate to freehand with practice.
Kawaii Cow Print
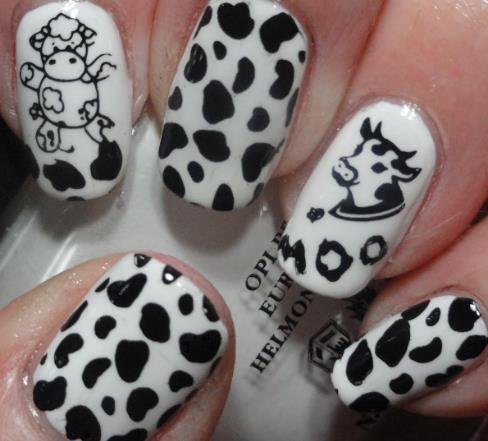
Cow print nails embrace the playful side of monochrome design. Create irregular organic shapes rather than uniform spots:
Application technique:
- White base coat (2 layers)
- Random black spots using dotting tool
- Connect some spots for variety
- Seal with glossy top coat
Optional: Add matte finish to black spots while keeping white glossy for texture contrast.
Night Celestial Scenes
These nails feature stars, moons, and constellations against black backgrounds. Create depth using:
- Tiny white dots for distant stars
- Larger dots for foreground stars
- Thin lines connecting constellation patterns
- Crescent moons across nail sequence
Use metallic white polish for extra shimmer that mimics starlight.
Negative Space Masterpieces
It designs expose natural nail between polish sections. Strategic clear areas create visual intrigue:
Best negative space patterns:
- Diagonal splits
- Circular cutouts
- Abstract shapes
- Text or symbols
Remember to buff natural nail for uniform appearance beneath clear areas.
Houndstooth Reinvented

Traditional houndstooth scales down for nail size while maintaining pattern integrity. Modern approaches include:
- Micro houndstooth for subtle texture
- Color-blocked houndstooth sections
- Mixed-scale designs across nails
Use stamping plates for consistent patterns or paint freehand for artistic variation.
Monochrome Plaid Elegance
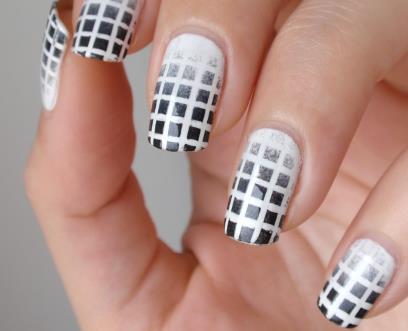
Plaid patterns require patience but deliver sophisticated results. Layer lines methodically:
- Base coat in white
- Thin vertical black lines
- Horizontal lines crossing verticals
- Thicker accent lines
- Clear top coat to seal
Pro tip: Create transparency effects by diluting black polish with clear for gray tones.
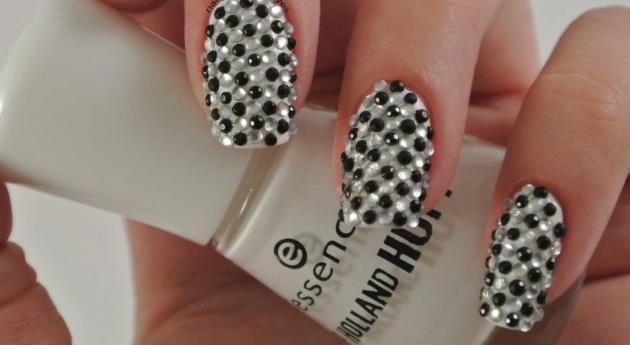
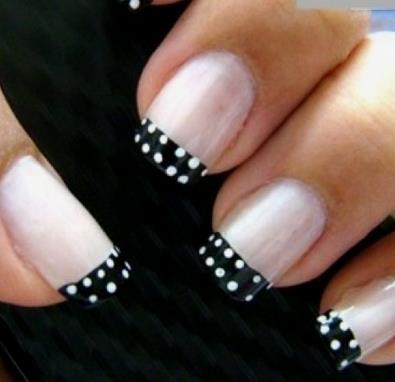
Rhinestone Sophistication
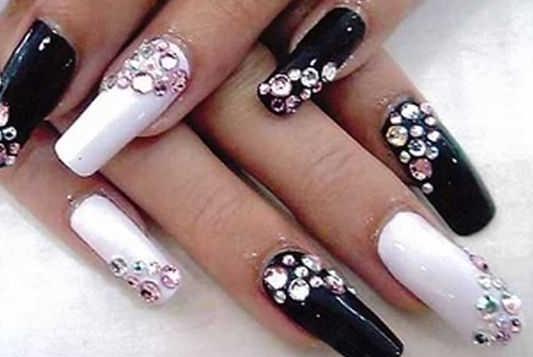
It elevate simple designs into glamorous statements. Strategic placement prevents overwhelming:
Ideal rhinestone patterns:
- Triangle formation on accent nail
- Cuticle line embellishment
- Corner clusters
- Single large stone centered
Secure with nail glue, not just polish, for lasting adherence.
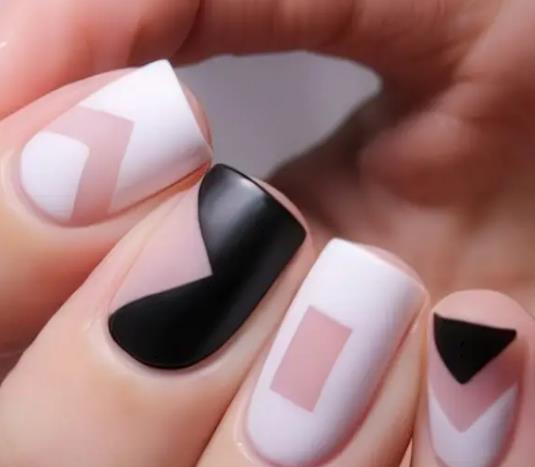
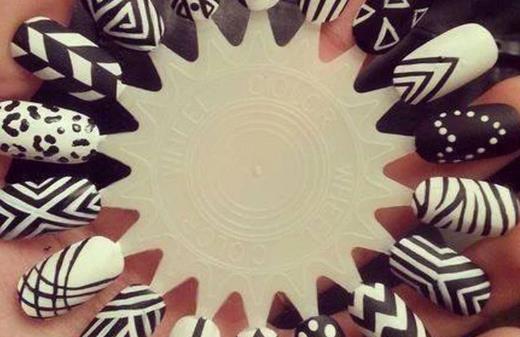
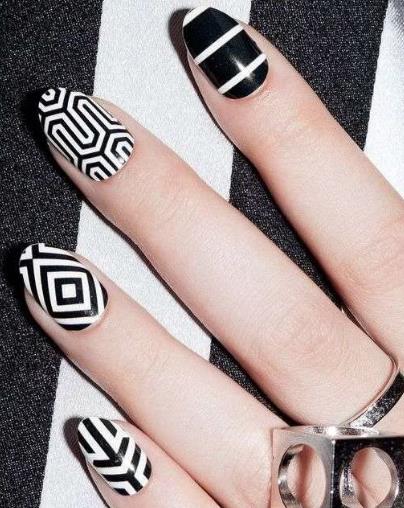
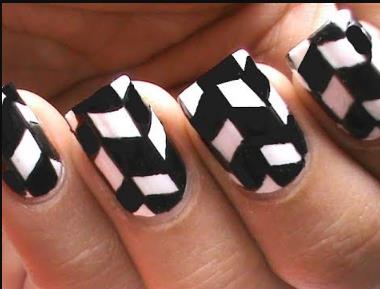
Geometric Illusions
These patterns create optical illusions through precise arrangement:
Popular illusory designs:
- 3D cube effects
- Impossible triangles
- Checkerboard warping
- Concentric shapes
Use ruler and protractor for mathematical precision or eyeball for organic feel.
Mixed Media Textures
Combine finishes for dynamic black and white nails:
| Finish | Application | Effect |
|---|---|---|
| Matte | Special top coat | Velvety appearance |
| Glossy | Standard top coat | Reflective shine |
| Sugar | Texture powder | Granulated surface |
| Chrome | Metallic powder | Mirror effect |
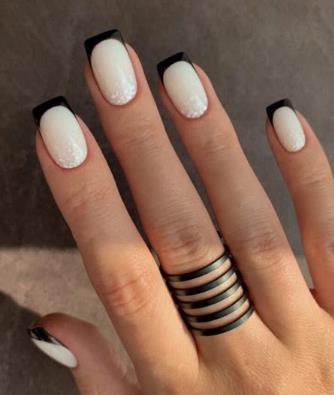
Double French Layering
French tips stack two smile lines for added dimension:
- Traditional white tip
- Thin black line above white
- Clear gap between layers
- Variations in line thickness
This design looks striking on longer nails where proportions remain balanced.
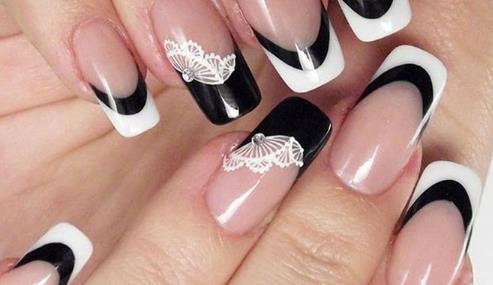
Floral French Fusion
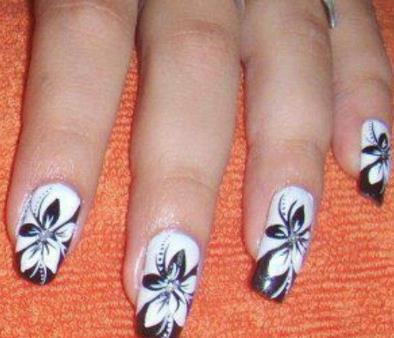
These nails meet classic French manicure through delicate embellishments:
- Tiny daisies along smile line
- Abstract petals replacing solid tips
- Vine patterns weaving through white
- Single flower accent on one nail
Use dotting tools for consistent flower shapes.
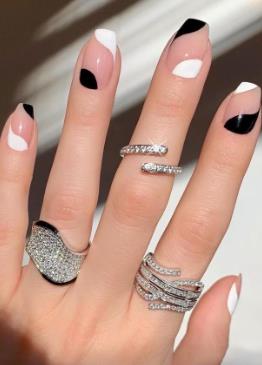
Side-Swept French
Diagonal French tips create movement across hands:
Application steps:
- Tape nail diagonally
- Paint exposed section white
- Remove tape immediately
- Clean edges if needed
- Seal with top coat
Adjust angle degree based on nail length – steeper angles suit shorter nails.
Micro French Tips
Ultra-thin French manicure requires precision tools:
- Striper brush (000 size)
- Steady hand positioning
- Quick-dry formula polish
- Cleanup brush with acetone
Practice on paper before attempting on nails.
V-Tip French Revolution
Sharp V-shaped tips modernize traditional French:
- Mark center point at tip
- Create two diagonal lines meeting at point
- Fill white section
- Clean angles with acetone
Vary V depth from subtle to dramatic based on nail length.
Floating French Accents
Detached tip designs float above natural nail edge:
- Single line hovering mid-nail
- Multiple parallel lines
- Curved floating elements
- Negative space between tip and “French”
This contemporary take suits shorter nails particularly well.
Yin Yang Balance
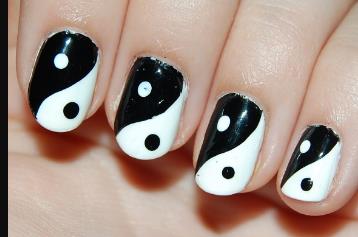
The classic symbol represents perfect balance in black and white nails:
Creating perfect circles:
- Use hole reinforcement stickers
- Paint half black, half white
- Add small dots for completion
- Remove sticker carefully
Position symbols across multiple nails for flowing design.
Doodle Art Minimalism
Freehand illustrations add personality to monochrome bases:
Popular doodle themes:
- Simple faces
- Abstract swirls
- Connected line art
- Tiny objects
Use ultra-fine brush or nail art pen for crisp lines.
Half-Moon Renaissance
It frames cuticles with contrasting color:
Modern variations:
- Multiple stacked crescents
- Asymmetrical shapes
- Negative space moons
- Metallic outlines
Requires steady hand or half-moon stencils for clean edges.
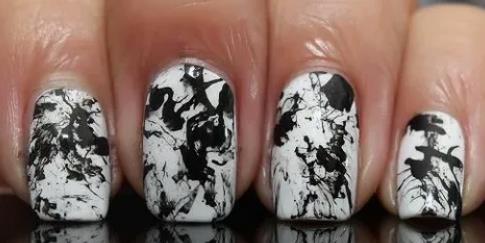
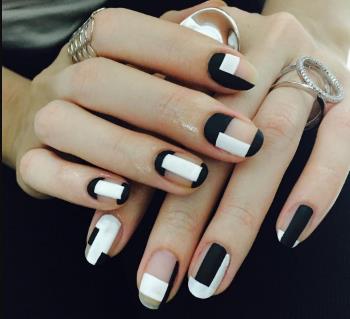
Abstract Expressionism
Channel inner artist with spontaneous strokes:
Techniques:
- Splatter paint effect
- Random brush strokes
- Stippling patterns
- Color blocking
Let creativity flow without overthinking placement.
Geometric Abstract
Precise shapes create mathematical beauty:
Essential tools:
- Striping tape
- Protractor
- Ruler
- Dotting tools
Combine circles, triangles, and squares for complex compositions.
Minimalist Line Art
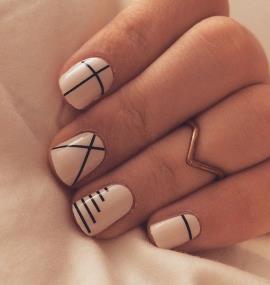
Single continuous lines create elegant designs:
Popular subjects:
- Face profiles
- Body silhouettes
- Botanical outlines
- Abstract curves
Practice on paper first to develop smooth motion.
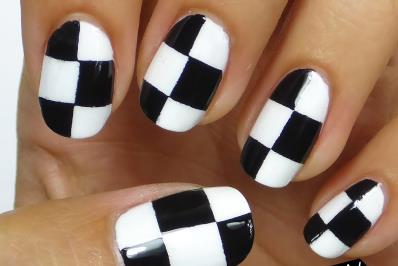
Checker Board Variations
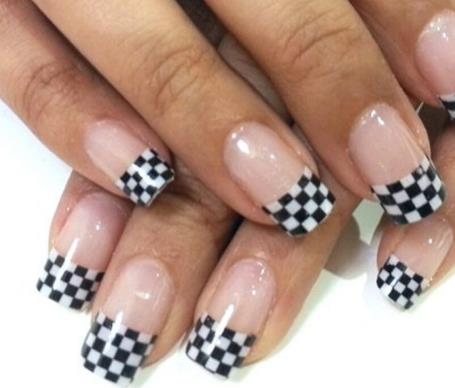
Beyond basic squares, explore:
- Wavy checkerboard patterns
- Mixed-size checks
- Diagonal orientation
- Gradient shading
Use grid method for consistent spacing.
Brutalist Architecture Inspired
Industrial minimalism influences nail art:
Key elements:
- Strong geometric forms
- Concrete texture effects
- Stark contrasts
- Raw edges
Achieve texture using matte top coat and stippling technique.
Digital Pixel Art
8-bit designs celebrate retro gaming:
Creation method:
- Plan design on graph paper
- Transfer using dotting tool
- Build pixel by pixel
- Seal carefully
Popular pixel subjects: hearts, stars, characters.
Monochrome Ombré Fusion
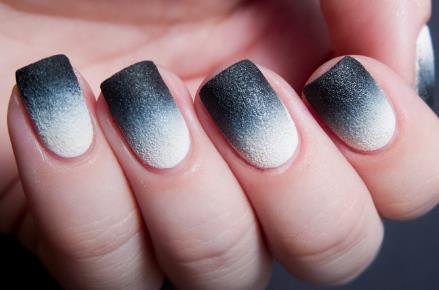
Black and white nails gradient creates smoky effect:
Technique variations:
- Vertical fade
- Horizontal transition
- Diagonal blend
- Scattered gradient
Use makeup sponge for smooth color transition.
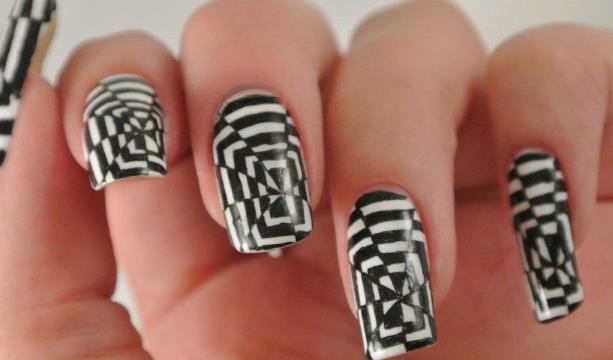
Optical Illusion Checkerboard
This mind-bending design plays with perspective through swirling checkerboard patterns. The hypnotic effect creates visual depth that draws attention to your black and white nails.
Application technique:
- Create a white base coat and let dry completely
- Use striping tape to mark curved lines that spiral from corner to center
- Paint alternating black sections between the tape
- Remove tape immediately before polish sets
- Add thin silver outline for enhanced 3D effect
Pro tip: Start the spiral wider at the base and taper toward center for maximum optical illusion impact. This design particularly shines on medium to long nail lengths.
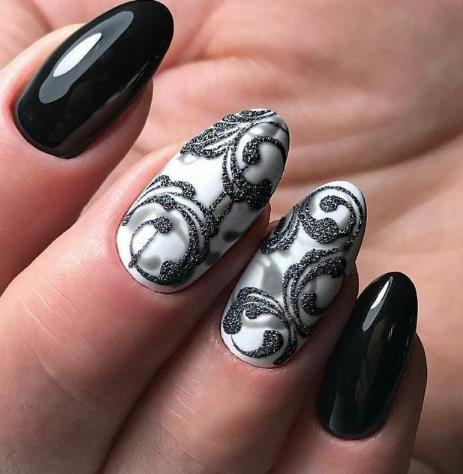
Gothic Lace Overlay
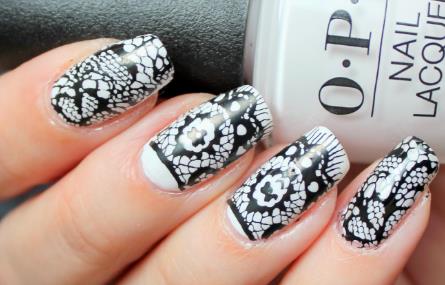
Delicate lace patterns layered over black create an elegant Victorian-inspired look perfect for formal events. This design transforms black and white nails into intricate works of art.
Creation method:
- Apply two coats of black polish as base
- Use white stamping polish with lace pattern plate
- Stamp design ensuring partial coverage for transparency effect
- Add tiny pearl accents at lace intersections (optional)
- Seal with matte top coat for authentic lace appearance
Alternative technique: For freehand application, use an ultra-fine brush to create interconnected floral and geometric patterns characteristic of gothic lace.
Application Techniques & Tools Guide
Master black and white nail designs with proper equipment:
| Tool | Purpose | Price Range |
|---|---|---|
| Detail brush | Fine lines | $5-15 |
| Dotting tool | Circles, dots | $3-10 |
| Striping tape | Clean edges | $2-5 |
| Stamping kit | Patterns | $10-30 |
Maintenance & Longevity Tips
Keep black and white nails pristine longer:
- Apply thin coats to prevent chipping
- Cap free edge with each layer
- Use quick-dry drops
- Wear gloves for housework
- Touch up chips immediately
Troubleshooting Common Issues
Fix problems quickly:
- Bleeding lines: Use cleanup brush
- Uneven texture: Additional top coat
- Yellowing white: UV protective coat
- Stubborn black removal: Foil method
Trend Forecast & Future Directions
2025 brings innovation to black and white nails:
- Temperature-changing polish
- LED-reactive designs
- Biodegradable glitters
- Sustainable polish formulas
Conclusion: Mastering Monochrome Manicures
Black and white nails are more than just a color combo—they’re a whole vibe. From zebra tips to marble swirls, this trend proves you don’t need neon to stand out. The high contrast gives every design a bold look while keeping it timeless. Whether you’re into soft daisy accents or sharp geometric patterns, there’s a black and white nail style for every personality. These designs work for casual days, nights out, and even formal events. They’re classy, edgy, and endlessly creative.
Trying black and white nails is a fun way to upgrade your look without going overboard. They’re easy to match with outfits and make your hands look instantly more polished. Plus, with styles like reverse French tips or negative space lines, you can make your mani as unique as you are. So if you’re ready to make a stylish statement, pick one of these cool designs and let your nails do the talking.
FAQs
Q1: How do I prevent black polish from staining my nails? Always apply quality base coat. For extra protection, use ridge-filling base coat that creates barrier between nail and pigment.
Q2: What’s the best way to achieve crisp white polish? Apply thin layers, allowing complete drying between coats. Choose pigmented white formula specifically designed for nail art.
Q3: Can I create these designs with regular polish or do I need gel? Regular polish works for most designs but gel provides better durability and easier blending for techniques like marble.
Q4: How do I make fine lines without bleeding? Use striping brush with minimal polish. Practice steady hand movement and clean brush frequently.
Q5: Which topcoat works best for black and white designs? Quick-dry, high-gloss topcoat prevents smudging while enhancing contrast between colors.
Q6: How can I remove intricate designs without damaging my nails? Soak cotton in acetone, place on nail, wrap in foil for 10-15 minutes. Gently push off softened polish.
Q7: What’s the easiest black and white design for beginners? Start with simple dots or negative space designs. Progress to lines and patterns as confidence builds.
Q8: How do I fix mistakes in complex designs? Use thin brush dipped in acetone to carefully remove errors. Touch up with matching polish.
Q9: Can these designs be done on short nails? Absolutely! Adjust pattern scale and choose vertical designs to elongate appearance.
Q10: How long do black and white nail designs typically last? With proper application and top coat, expect 7-10 days for regular polish, 2-3 weeks for gel.