
Learning how to fade your own hair can save you hundreds of dollars annually while giving you complete control over your look. As someone who’s spent years perfecting DIY grooming techniques, I’ll walk you through every step of creating professional-quality fade haircuts techniques at home. This comprehensive guide draws from barber techniques and real-world experience to help you master the art of self-fading.
Understanding Fade Haircuts
What Makes a Fade Different from Other Cuts
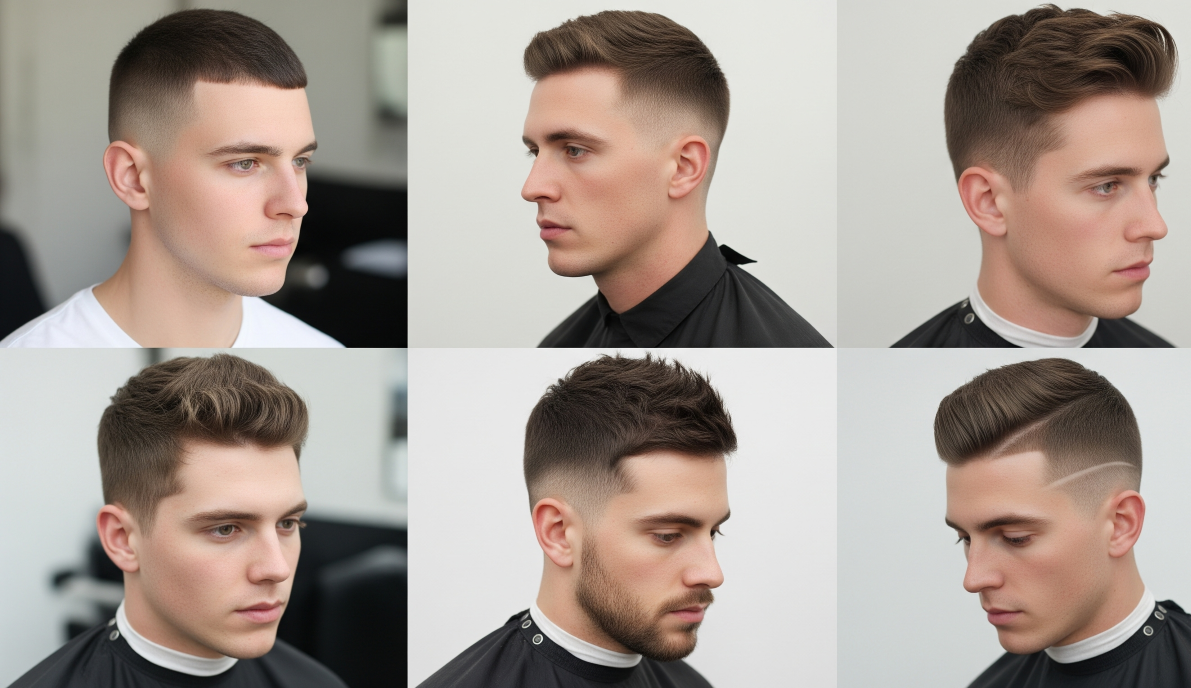
A fade haircut creates a smooth, gradual transition from longer hair on top to very short hair on the sides and back. Unlike traditional haircuts that leave distinct lines between different lengths, fades blend the hair seamlessly together. The result is a clean, professional look that eliminates harsh boundaries and follows the natural contours of your head.
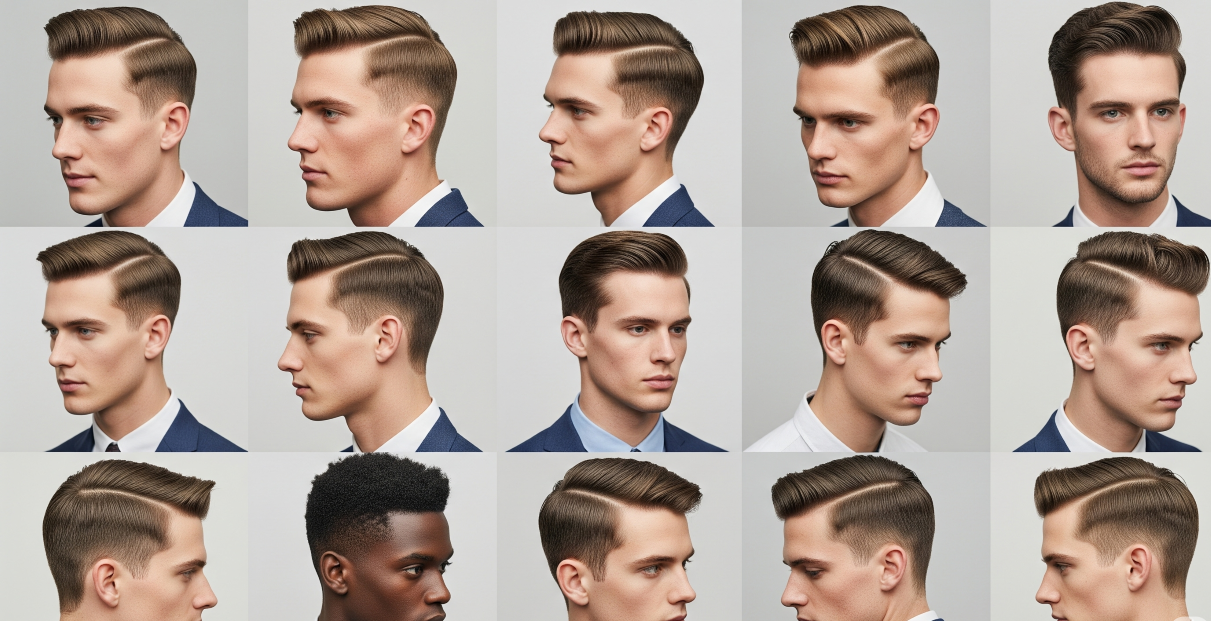
Fade Variations Explained (Low, Mid, High, Skin)

Low fade starts the transition just above your ears and around the back of your neck.
Mid fade begins around your temple area, offering more contrast than low fades. This versatile choice complements most men’s hairstyles from pompadours to crew cuts.
High fade starts near the top of your head, creating dramatic contrast. Perfect for undercuts and contemporary styles that demand attention.
Hi-top fade represents the most extreme version, where sides get cut extremely short while maintaining significant length on top.
Choosing the Right Fade for Your Face Shape
- Round faces benefit from high fades that add vertical lines to create the illusion of a longer face.
- Square faces look great with low to mid fades that soften strong jawlines.
- Oval faces can pull off any fade style, offering the most versatility.
- Long faces should choose low fades with more volume on top to balance their proportions.
Essential Equipment Breakdown
Professional vs Budget Clippers (What Actually Matters)
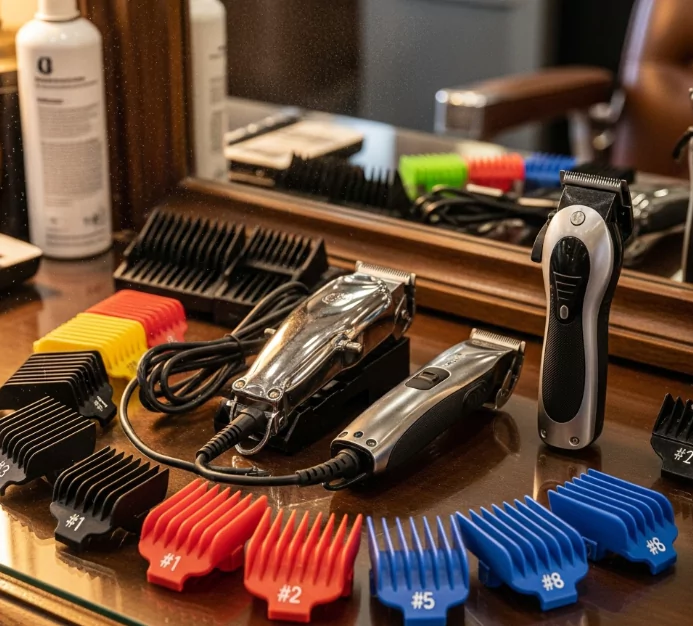
Professional-grade clippers like the Oster Classic 76, Wahl Senior, or Andis Master deliver consistent power and precision. .
Budget options can work, but they often struggle with power consistency.
Motor quality matters most. Magnetic motors in professional clippers maintain consistent speed under load. Rotary motors in budget models sometimes bog down in thick hair, creating uneven cuts.
Blade quality affects your results significantly. Carbon steel blades stay sharper longer than cheaper alternatives. Always oil and clean clipper blades after each use to maintain optimal performance.
Mirror Positioning for Solo Cutting
A proper mirror setup is crucial for a successful DIY fade. Place your main mirror at eye level and use a handheld mirror to see the back of your head. For more precision, consider a three-way mirror. Ensure you have bright, white lighting to avoid missing any spots, as natural daylight is best.
Pre-Cut Preparation
Hair Washing and Drying Best Practices
- Start with freshly washed and towel-dried hair.
- Comb through your hair to remove all tangles.
- Ensure your hair is damp but not soaking wet to prevent clipper blades from clogging.
Setting Up Your Workspace for Success
To prepare your workspace, clear a large, well-lit area around your mirror setup so you have room to move and see from all angles. Lay out all your tools—clippers with various guard sizes, scissors, a comb, and a handheld mirror—within easy reach. Finally, cover the surrounding surfaces with newspaper or a towel to make cleanup quick and simple.
The Fade Execution Process

Creating Your Starting Line (The Foundation)
To set your fade line, decide where you want the transition to start, such as just above the ear for a low fade. Use a long guide comb, like a #7 or #8, to cut a perfectly level horizontal line around your head. This foundation is crucial, so take your time to ensure it is even.
Guard Progression Strategy (When to Switch)
Progress through your guards from longest to shortest, for example, from a #7 to a #1. Work in one-inch vertical sections, completing each level around your entire head before switching to the next guard. This creates distinct layers that will be blended in the next step.
Blending Techniques for Seamless Transitions
For a professional blend, use the clippers-over-comb method. Hold the comb at a slight angle and run the clippers along it with light, overlapping strokes, lifting gradually as you move up. Work in small sections and be patient, as this process requires care to avoid creating harsh lines.
Working the Back of Your Head (The Tricky Part)
The back of your head is the hardest part to fade yourself. Use a handheld mirror to constantly check your progress. Start with a longer guard and cut conservatively, as you can’t add hair back. Use your fingers to feel for any uneven spots that you might not be able to see in the mirror.
Neckline and Ear Area Precision
- Use your shortest guard (#1 or #2) or a beard trimmer to create clean lines around the ears and neck.
- Work slowly and follow the natural curves of your neck and ears.
- A straight razor can be used for the sharpest lines if you have experience, otherwise stick to clippers.
Critical Mistakes That Ruin Fades
Cutting too short too fast: Start with a longer guard and progress gradually; you can always cut more hair off, but you can’t put it back on.
Ignoring hair growth patterns: Work with your hair’s natural growth direction, especially in areas with cowlicks, to avoid uneven results.
Poor mirror and lighting setup: Inadequate lighting and mirror angles can cause you to miss spots and create an uneven haircut.
Rushing the blending process: Take your time blending with light, overlapping strokes to achieve a smooth, professional-looking transition.
Advanced Techniques for Better Results

Clippers-over-comb fade method elevates your results significantly. This professional technique allows precise length control and creates seamless blends.
Hair tapering vs fading represents another advanced concept. While fades create distinct length changes, tapering provides ultra-gradual transitions. Combining both techniques creates the most natural-looking results.
Troubleshooting Common Issues
Fixing lines: Use the clippers-over-comb method with a longer guard or thinning shears to soften harsh lines.
Dealing with cowlicks: Cut cowlicks slightly shorter than the surrounding hair to help them lay flatter.
When to stop: If a mistake is beyond your skill level, stop cutting immediately and seek professional help.
Frequently Asked Questions
Q: How to fade hair?
To fade hair, start with longer guard sizes (#7–#5), create your fade line, then blend down using shorter guards (#3–#1) for a smooth transition.
Q: How to fade your own hair?
To fade your own hair, use quality clippers, set your fade line with longer guards, then taper down with shorter sizes while blending evenly in the mirror.
Q: How to do a hair fade?
To do a hair fade, work on clean, damp hair, mark your fade line, then cut with progressively shorter guards and blend with upward clipper strokes.
Q: What is the 3-2-1 rule for haircuts?
The 3-2-1 haircut rule means using guard #3 on top, #2 in the middle, and #1 on the bottom to achieve a natural fade.
Mastering how to fade your own hair takes practice, but the results are worth the effort. Start conservatively, use quality tools, and remember that each attempt teaches you something valuable. With patience and proper technique, you’ll soon create fade haircuts that rival professional barbershop results. The key is understanding that great fades come from methodical technique, not speed or shortcuts.